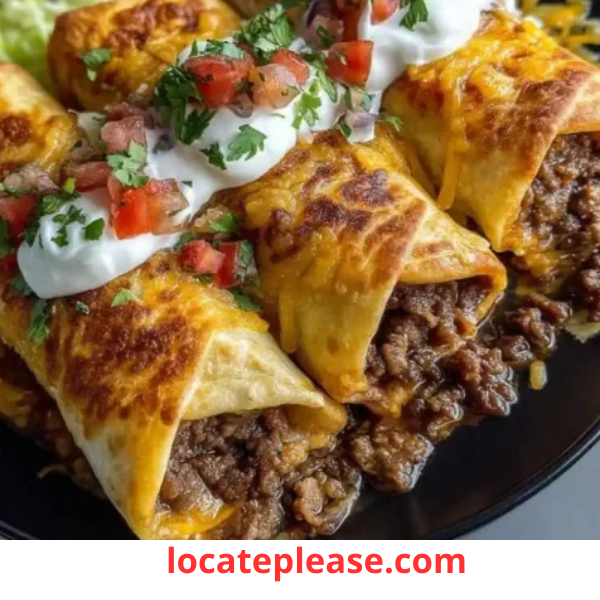
These Beef and Cheese Chimichangas are crispy, cheesy, and packed with bold taco-seasoned beef. Whether baked or fried, they’re a crowd-pleasing dish that’s easy to make with simple pantry ingredients. Perfect for weeknight dinners, game-day snacks, or entertaining, these chimichangas deliver restaurant-quality flavor right at home!
Why You’ll Love This Recipe:
- Crispy & Cheesy: Golden tortillas encase a gooey, cheesy beef filling.
- Customizable: Top with salsa, sour cream, guacamole, or jalapeños for extra flair.
- Two Cooking Methods: Choose between baking for a healthier option or frying for traditional crispiness.
Ingredients (Serves 4–6):
- 1 lb ground beef 🍖
- ½ cup onion , finely chopped 🧅
- 2 cloves garlic , minced 🧄
- 1 packet taco seasoning 🌶️
- ½ cup water 💧
- 1 cup shredded cheddar cheese 🧀
- 1 cup shredded Monterey Jack cheese 🧀
- 6 large flour tortillas 🌯
- ¼ cup melted butter or vegetable oil (for brushing/frying ) 🧈
- Sour cream, salsa, and chopped cilantro (for serving ) 🥄
Instructions:
Step 1: Cook the Beef Mixture 🔥
- In a large skillet over medium heat, cook the ground beef , breaking it apart with a spoon until browned.
- Add the finely chopped onion and cook for about 3 minutes , until softened.
- Stir in the minced garlic and cook for another 30 seconds , until fragrant.
- Sprinkle in the taco seasoning and add ½ cup water . Stir well to combine.
- Reduce the heat and simmer for 5 minutes , allowing the mixture to thicken and flavors to meld.
- Remove from heat and let it cool slightly.
Step 2: Assemble the Chimichangas 🌯
- Warm the flour tortillas slightly in the microwave or on a skillet to make them pliable.
- Spoon a generous portion of the beef mixture into the center of each tortilla.
- Sprinkle a mix of shredded cheddar and Monterey Jack cheese over the beef.
- Fold the sides of the tortilla over the filling, then roll it tightly from the bottom to fully enclose the filling. Repeat with the remaining tortillas and filling.
Step 3: Bake or Fry the Chimichangas 🔥
Baking Method (Healthier Option):
- Preheat your oven to 400°F (200°C) . Line a baking sheet with parchment paper.
- Place the rolled chimichangas seam-side down on the prepared baking sheet.
- Brush each chimichanga lightly with melted butter or vegetable oil for a crispy texture.
- Bake for 20–25 minutes , flipping halfway through, until golden brown and crispy.
Frying Method (Traditional Crispy Option):
- Heat about 1 inch of vegetable oil in a deep skillet over medium-high heat until it reaches 350°F (175°C) .
- Carefully place the chimichangas seam-side down into the hot oil.
- Fry for 2–3 minutes per side , until golden brown and crispy.
- Remove with tongs and drain on paper towels to absorb excess oil.
Step 4: Serve 🍽️
- Serve the chimichangas warm with your favorite toppings:
- Sour cream
- Salsa
- Guacamole
- Chopped cilantro
- Shredded lettuce, diced tomatoes, or jalapeños
- Enjoy these crispy, cheesy chimichangas as a satisfying meal or snack!
Tips for Success:
- Add Veggies: Stir diced bell peppers, zucchini, or spinach into the beef mixture for added nutrition.
- Make Ahead: Assemble the chimichangas ahead of time, cover, and refrigerate for up to 1 day before baking or frying.
- Storage: Store leftovers in an airtight container in the refrigerator for up to 3 days . Reheat in the oven or microwave.
- Freeze Option: Freeze unbaked chimichangas on a baking sheet, then transfer to a freezer-safe bag. Bake directly from frozen, adding an extra 5–10 minutes to the cooking time.
Nutritional Information (per chimichanga, makes 6):
- Calories: ~350 kcal
- Protein: ~18g
- Carbohydrates: ~25g
- Fat: ~20g
Enjoy these Beef and Cheese Chimichangas as a hearty, flavorful dish that’s perfect for any occasion. Their crispy exterior, melty cheese, and savory beef filling make them irresistible. Whether you bake them for a lighter option or fry them for maximum crunch, these chimichangas are sure to become a family favorite. Top them with your favorite garnishes and dig in!


