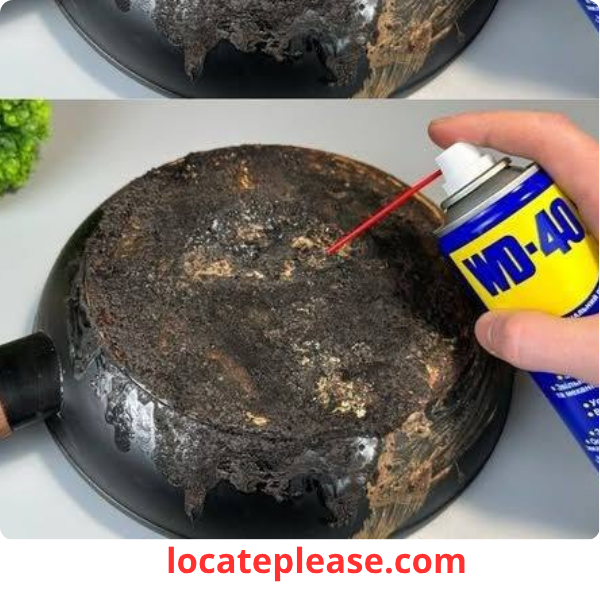
We’ve all been there: you’re making dinner, get distracted for just a few minutes, and suddenly — smoke. You rush to the stove to find your favorite pan covered in charred, stubborn, burnt-on food that looks like it’s fused to the metal.
Before you throw it out or spend 30 minutes elbow-deep in suds, stop.
There’s a simple, natural, and incredibly effective method that will make that burnt pan look almost new again — without harsh chemicals or endless scrubbing.
This two-ingredient powerhouse — baking soda and vinegar — works like magic to lift burnt residue, break down grime, and restore your cookware with minimal effort.
And the best part?
You probably already have everything in your kitchen.
🛠️ What You’ll Need
- ½ cup baking soda
- ¼ cup white vinegar (or water, if you don’t have vinegar)
- A few drops of dish soap
- A non-abrasive sponge or scrub brush
- A spatula or wooden spoon (optional, for scraping)
- Hot water
🔥 How to Clean a Burnt Pan: 5 Easy Steps
Step 1: Sprinkle Baking Soda
Pour ½ cup of baking soda evenly across the bottom of the burnt pan. Focus on the most scorched areas.
💡 Why it works: Baking soda is a gentle abrasive and natural deodorizer that helps lift stuck-on food without scratching your cookware.
Step 2: Add Vinegar (or Water) + Dish Soap
Slowly pour ¼ cup of white vinegar over the baking soda.
Add a few drops of dish soap for extra cleaning power.
Watch the fizz!
The chemical reaction between baking soda and vinegar helps loosen the burnt-on gunk, breaking it down at a molecular level.
🌊 No vinegar? Use hot water instead — it still activates the baking soda and softens residue.
Step 3: Let It Sit for 10–15 Minutes
Allow the mixture to bubble and work its magic. For extra-tough stains, let it sit up to 30 minutes. The longer it sits, the easier the scrubbing.
Step 4: Scrub Gently
Using a non-abrasive sponge or brush, scrub the pan in circular motions. You’ll notice the burnt food lifting away with minimal effort.
For stubborn spots, use a wooden spatula to gently scrape — never metal, which can damage nonstick or seasoned surfaces.
Step 5: Rinse and Repeat (If Needed)
Rinse with warm water. If any residue remains, repeat the process once more.
Once clean, dry your pan and inspect the results — you’ll be amazed at how shiny and fresh it looks!
✅ Why This Method Works So Well
|
Baking Soda
|
Mild abrasive that lifts stains without scratching
|
|
Vinegar
|
Natural acid that dissolves mineral deposits and breaks down burnt food
|
|
Dish Soap
|
Cuts through grease and lifts oils
|
|
The Reaction
|
Fizzing action penetrates deep into stuck-on layers
|
This combo is safe for most cookware — including stainless steel, ceramic, and enamel — and gentler than steel wool or chemical cleaners.
🧽 Bonus Tips for Extra Tough Stains
- Simmer it: Fill the pan with water, add ½ cup baking soda, and bring to a gentle simmer for 10–15 minutes. Then scrape and scrub.
- Use lemon juice: Replace vinegar with lemon juice for a fresh scent and extra acidity.
- Prevent future burns: Never leave a pan unattended on high heat, and add a splash of water or oil if food starts sticking.
🔄 When to Consider Replacement
While this method works wonders, some damage can’t be reversed:
- Deep pitting or warping
- Flaking nonstick coating
- Rust on cast iron (though that can often be re-seasoned)
But for 9 out of 10 burnt pans?
This trick brings them back to life.
Final Thoughts: Don’t Toss It — Restore It!
That scorched pan doesn’t need to be a lost cause.
With just baking soda, vinegar, and a few minutes of your time, you can rescue your cookware, save money, and reduce waste.
It’s eco-friendly, budget-friendly, and shockingly effective.
So the next time dinner goes sideways, don’t panic.
Just grab the baking soda —
and get ready to be amazed.
🔥✨
One pan, two ingredients, zero stress. That’s kitchen magic.


